> For the complete documentation index, see [llms.txt](https://docs.talisman.xyz/talisman/llms.txt). Markdown versions of documentation pages are available by appending `.md` to page URLs; this page is available as [Markdown](https://docs.talisman.xyz/talisman/customize/managing-networks-and-tokens/joining-evm-networks.md).
# Joining EVM Networks
This procedure is only needed for not yet imported EVM networks. Substrate based chains can **not** be manually added in this way.
Some very frequently used EVMs and those that are close to the Polkadot and Kusama ecosystem are pre-imported. You can use **Ethereum, Arbitrum, Astar, BSC, Ethereum, Gnosis, Moonbeam, Moonriver, Polygon and Shiden** directly without having to import them first.
As you might be already aware, there are countless EVMs available on the internet. There are so many that it is not possible for Talisman to keep up with each of them and update the wallet to have every working EVM available and already imported. The amount of data needed to be fetched would also be too much for a convenient wallet experience. Yet
Instead you need to import the EVM network yourself. Don't worry, you don't have to research and put in the specifications of the network yourself!
All thats needed is to try and interact with a dApp like a DEX or a Bridge that is build on top of the desired network. As soon as you try to connect your wallet, Talisman will pop up and ask for your approval on adding this new network persistently to your wallet. The Talisman wallet is then automatically picking up the network's metadata like rpc addresses, name, logo and many more and makes the network available to you.
In this example a new EVM network will be added to the Talisman wallet. It's less than 10 steps. If you want to add custom EVM tokens you can check out this [article](/talisman/customize/managing-networks-and-tokens/adding-custom-tokens.md). At the bottom of the page you will find the necessary steps for using a bridge with two EVMs.
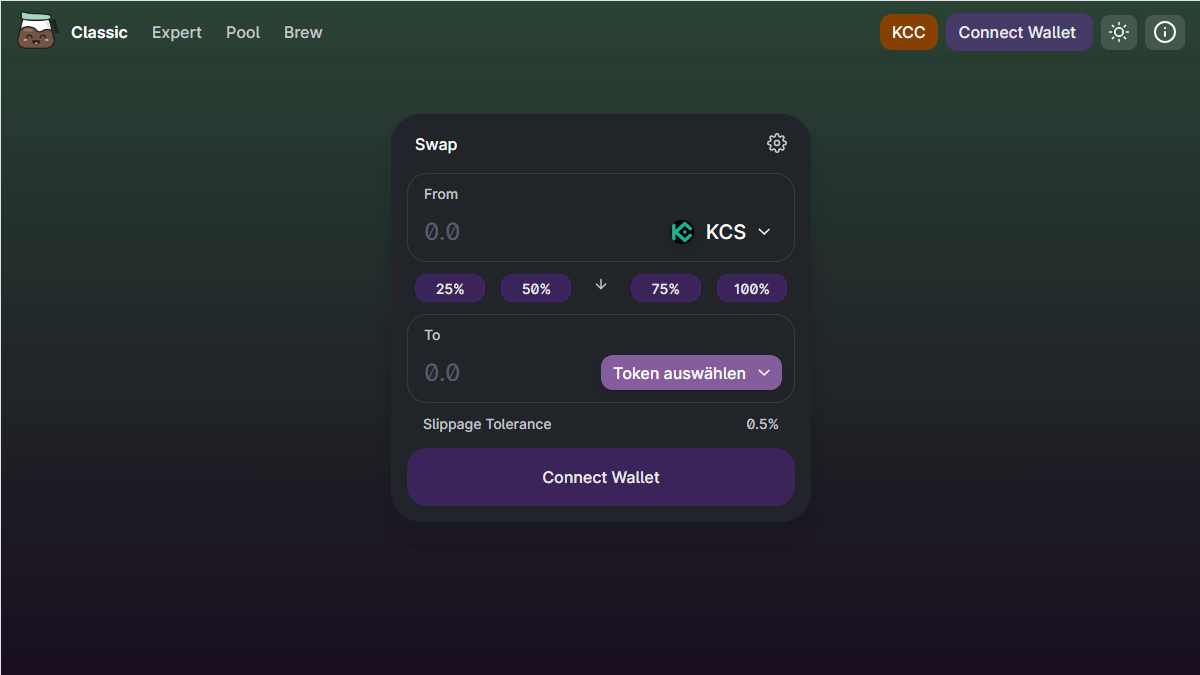
1\. Visit a dApp build on top of the desired network. In this case Koffeeswap DEX on the KuCoin community chain. As you can see we have not yet connected a wallet. To connect Talisman press `Connect Wallet`.
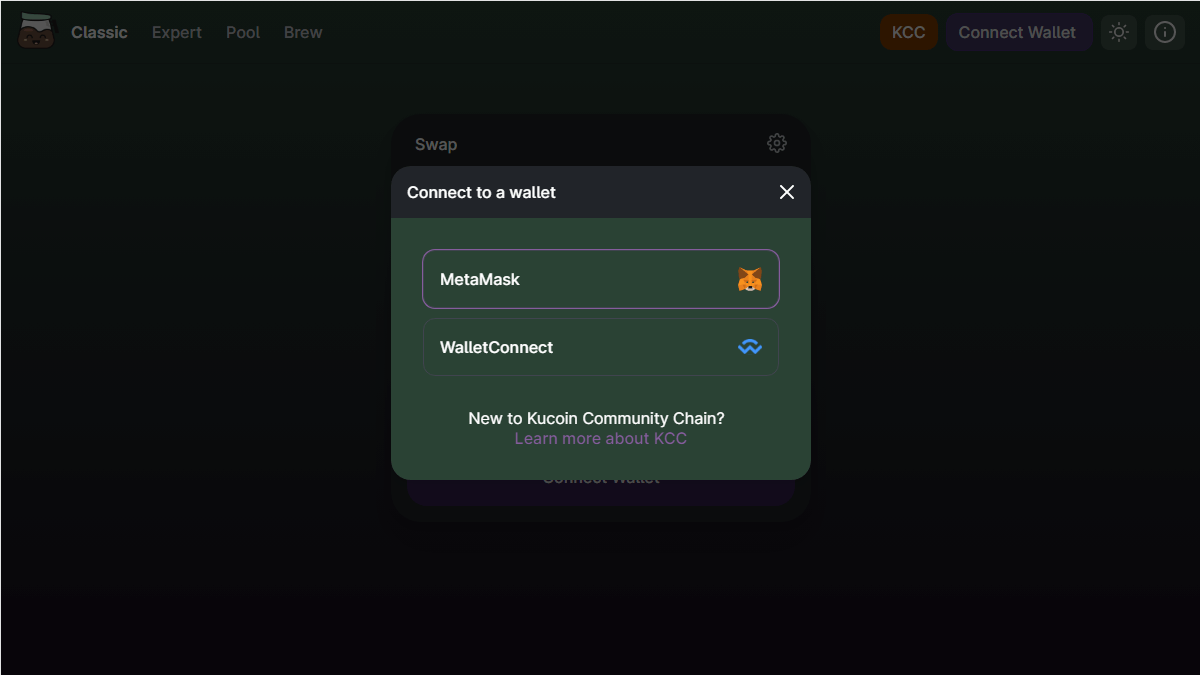
2\. Click `MetaMask`. Now the Talisman MetaMask Compatibility Mode comes into play. Whenever the dApp allows connection with MetaMask, Talisman will respond to the calls that are usually picked up and responded by MetaMask. In order for this to work **the actual MetaMask browser extension needs to be disabled** and the MetaMask Compatibility Mode in Talisman needs to be turned on. You will find it in the settings.
3\. Talisman pops up and you need to chose an account you want to connect with. Confirm by clicking `Connect 1`.
4\. The dApp complains about a wrong network. Close this error message and proceed to the next step.
5\. Click `Switch to KCC Network`. A popup will appear.
6\. Talisman asks for your approval for adding this network permanently to your talisman wallet. Click `Approve`. You can also check the Details beforehand by clicking `View Details` to confirm the specifications on the chain to be added.
7\. Now the account is recognized by the dApp and you can start using it just like any other EVM dApp that you already know. Clicking on the accounts address in the top right lets you manage all the accounts you connected in the third step of this example.
8\. Finally check your Talisman wallet in the extension view. At the top there is `1 connected` visible which indicates the amount of accounts you connected. On the right side is the logo of the currently selected chain displayed. Click this button if you want to add more accounts or check more details about the network. Thats it, you are done. You can follow this procedure for every other EVM you want to add in the future.
### Bridging between EVMs
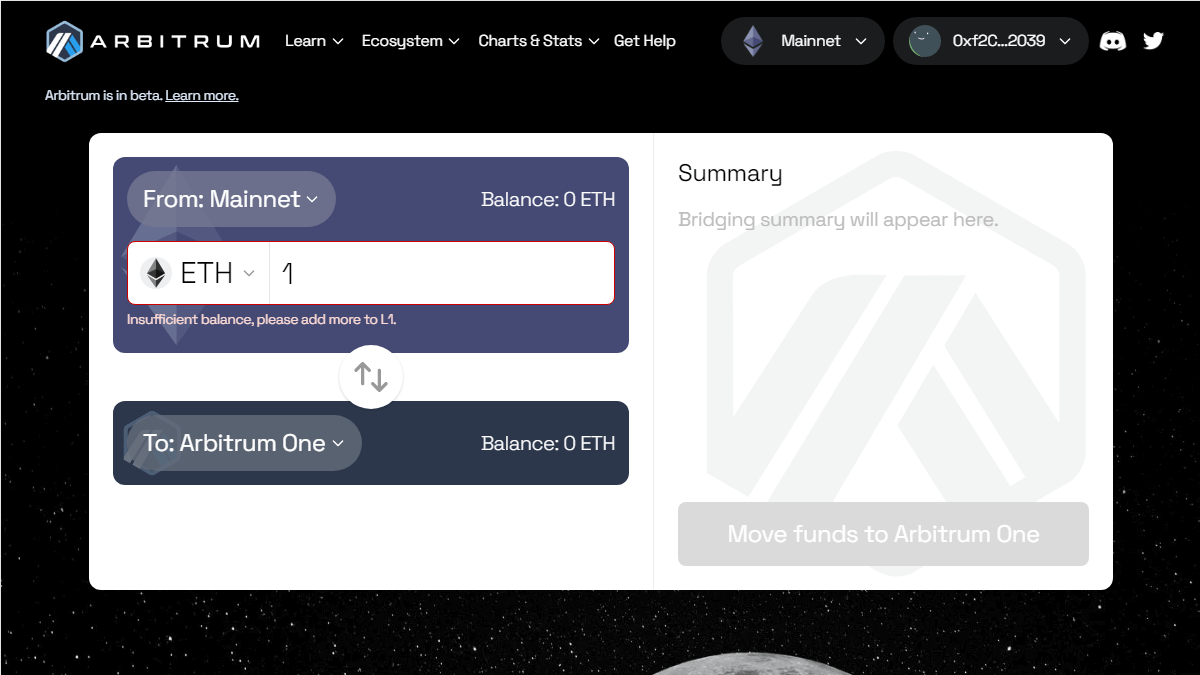
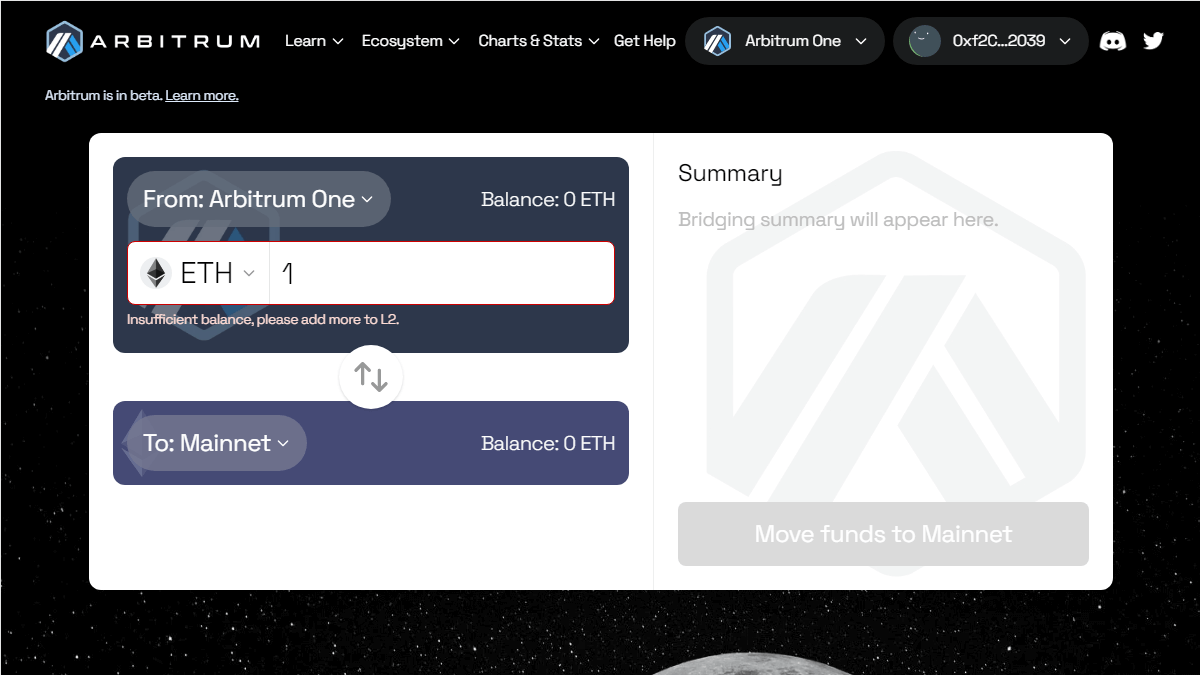
Bridging betweens EVMs is somewhat a special case because this basically requires you to do the just described procedure of connecting and importing a new EVM twice. A bridge could be seen as having two states. Each state being bound to one network. If you want to move funds from network a to network b it is necessary that your Talisman wallet is connected to network a to successfully sign the transaction.
Take this Arbitrum <-> Ethereum bridge as an example.
State 1: Moving funds from Ethereum mainnet to Arbitrum. In the top right of the website the connection to the Ethereum mainnet is declared. You can check your Talisman extension via the `1 connected` button on top of the extension view. This should also state a connection to Ethereum.
ETH Mainnet state
State 2: Moving funds from Arbitrum to the Ethereum mainnet. Exactly vice versa your Talisman wallet should now be connected to the Arbitrum chain for successfully signing the transaction. The state of Talisman will change analogous to what you are setting in the Bridge's UI. Notice that the account stays the same as we are only changing the network connection but not the account.
.png?alt=media&token=50caf7b9-ec16-468b-b179-1ff3a586f71e)
.png?alt=media&token=d60e0e63-3ee4-4614-a16d-c659564c0f2c)
.png?alt=media&token=b50f0dfa-8cdf-4173-9bd8-2fd75bfaa378)
.png?alt=media&token=753e9434-2efc-41f8-8676-fc5a53b7999c)
.png?alt=media&token=b8b9d90f-a9ce-4023-98f4-bf52ee24e1e3)
.png?alt=media&token=59c5c191-5826-41fd-824a-0ac710c5282f)