For the complete documentation index, see llms.txt. This page is also available as Markdown.

How to Reap your Account

Overview of how to reap your account in Polkadot via one of two methods

Account reaping refers to the process of emptying and removing an account from the blockchain when its balance dips below the existential deposit.

The existential deposit is the minimum balance required to keep an account active on the Polkadot network. This threshold ensures the blockchain remains free of accounts that are no longer in use or have been abandoned, thus maintaining network efficiency and performance.

This action of reaping is sometimes permanent: once an account is reaped, its assets can be lost forever. However, the account address itself remains, and it can be reactivated by sending new funds to it.

If you wish to intentionally clear your account this can be done with the send max feature (the “short” way) OR using Polkadot.js apps (the “long” way), which allows you to transfer all coins or tokens from your account, bringing its balance below the existential deposit and triggering reaping.

Why Reap a Polkadot Account?

There are specific scenarios where reaping a Polkadot account might be a strategic or necessary decision. Understanding these situations can help you make informed choices about managing your assets within the Polkadot ecosystem.

  1. Consolidating Funds: One common reason for reaping an account is to consolidate funds. If you have multiple accounts, each with small balances, it might be more efficient to consolidate these funds into a single account.

  2. Asset Reallocation: In some cases, users might want to reallocate their assets for investment reasons. Reaping an account can be a part of this larger financial strategy in effort to send assets elsewhere for new invest opportunities or an exchange for liquidity.

  3. Security Reasons: In certain situations, for security reasons, you might want to close an account and transfer its funds to a new one. This could be in response to a security compromise or as a precautionary measure if you feel the security of your account has been threatened.

Step-by-Step Guide to Reaping Your Account

The “Short” Way: How to Reap you account in Polkadot via Talisman Wallet Send Max

Step 1: Open the Talisman Wallet

Example of Wallet Extension Opened

Step 2: Select Send

Talisman Wallet: Select “Send”
Select “Send”

Step 3: Select the token or network

Talisman Wallet: Enter token or network name or select the token
Enter token or network name or select the token

Step 4: Enter address or select another account

Talisman Wallet: Enter the "Send to" Address
Enter the "Send to" Address

Step 5: Now select the “Max” button in the Send screen

Talisman Wallet: Select “Max”
Select “Max”

Step 6: Make sure all looks correct and select “Review” in the Send screen

Talisman Wallet: Select “Review”
Select “Review”

Step 7: Once Reviewed, select “Confirm” to complete send and emptying your account

Talisman Wallet: Select “Confirm”
Select “Confirm”

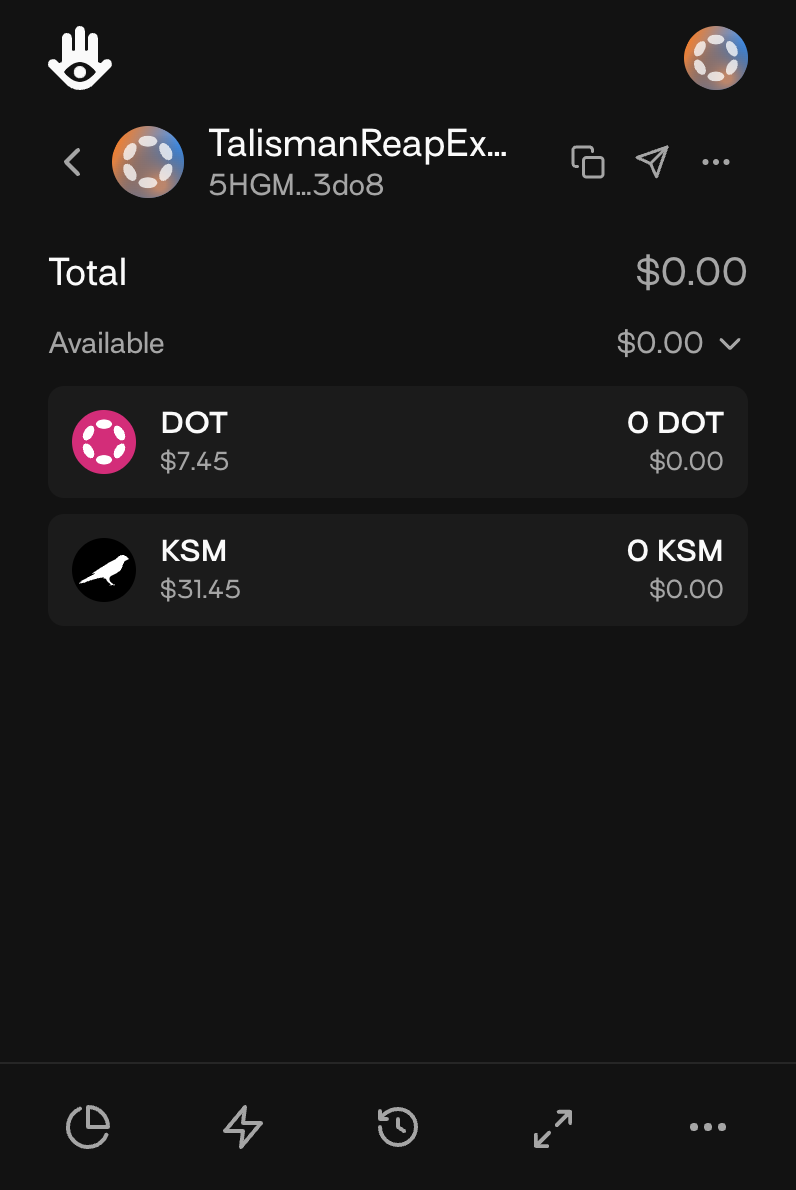
Step 8: After, you will land on the Wallet view with a 0.00 balance and your account will soon be reaped.

Talisman Wallet: Return to Wallet with 0.00 balance, ready to be reaped
Return to Wallet with 0.00 balance, ready to be reaped

The “Long” Way: How to Reap you account in Polkadot via Polkadot-JS UI and Talisman

Important Notice: Always make sure you are using the official and secure versions of Talisman and the polkadot.js UI. Download or access these tools only from their verified websites to protect yourself from fraudulent versions and ensure your crypto transactions are safe and secure. Furthermore, use other security wallet extensions to check and validate what you’re using is secure.

Prerequisite Step:

To start from the Talisman Wallet, know which account information that you’re going to reap and where you are going to send the assets in advance - you will need them in step 2 and 5:

Review & Make Note of Intended Account To Be Reaped

Step 1: Navigate to polkadot.dotapps.io (for a fully decentralized experience). Note: one may also use the main page at Polkadot-JS UI (https://polkadot.js.org/apps/#/explorer) website.

Once the URL is hit you will see a webpage appear like this (wait for the extension to prompt you):

Talisman Wallet:  Polkadot-JS UI Connection
Polkadot-JS UI Connection

Step 2: You will then be prompted by the Talisman Extension to select an account to connect to:

Talisman Wallet: Click the account you want to reap
Click the account you want to reap
Talisman Wallet: The  “Connected” account will light up Green
The “Connected” account will light up Green

Step 3: After connecting, you will land on the main Polkadot-js ui page from which you can do many actions. From here you will select the relevant account you want to reap through the polkadot-js ui:

Talisman Wallet: This is where you’ll land after connecting your Talisman account
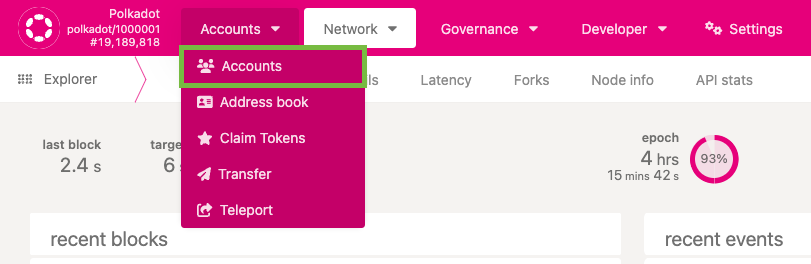
This is where you’ll land after connecting your Talisman account
Talisman Wallet: Next hover over (and or click) the Accounts dropdown and click “Accounts”
Next hover over (and or click) the Accounts dropdown and click “Accounts”

Step 4: You will then see the account you had previously connected via the Talisman extension and click send to begin reaping the account:

Talisman Wallet: Send Talisman Wallet via Polkadot UI
Click “Send”

Note that there’s a warning to select the relevant network, but by default it is the Polkadot network. So if you’re reaping another account on another network in the Polkadot ecosystem (like Kusama) please select the network that aligns with the account you are reaping.

Step 5: Select and enter or paste in the Send To Address to begin the transfer:

Talisman Wallet: Select “ENTER SEND TO ADDRESS”
Select “ENTER SEND TO ADDRESS”
Talisman Wallet: Enter or Paste the “Send To Address” where you intend to send the funds
Enter or Paste the “Send To Address” where you intend to send the funds

Step 6: You’ll notice there is a button that is engaged labeled “transfer with account keep-alive checks.” With this engaged, you can never exceed the existential deposit and not wipe the account of all funds, resulting in a reaping of the account during the next epoch. Therefore, turn off and disengage the button:

Talisman Wallet: Turn of the “transfer with account keep-alive checks” button
Turn of the “transfer with account keep-alive checks” button

Step 7: Now a new button will appear labeled transfer the full account balance, read the sender. You will engage and turn on this button to enable a full send of funds off the account:

Talisman Wallet: Turn on and engage the button “transfer the full account balance, reap the sender” (Green Box)
Turn on and engage the button “transfer the full account balance, reap the sender”
Talisman Wallet: End state with “transfer the full account balance, reap the sender” button engaged/turned on
End state with “transfer the full account balance, reap the sender” button engaged/turned on

Step 8: Now, what we have been trying to get to from the beginning, making the transfer of all funds from the account:

Talisman Wallet: Click the “Make Transfer” button
Click the “Make Transfer” button

Step 9: Upon initiating the transfer you will be prompted to authorize the transaction. Go ahead and Sign and Submit.

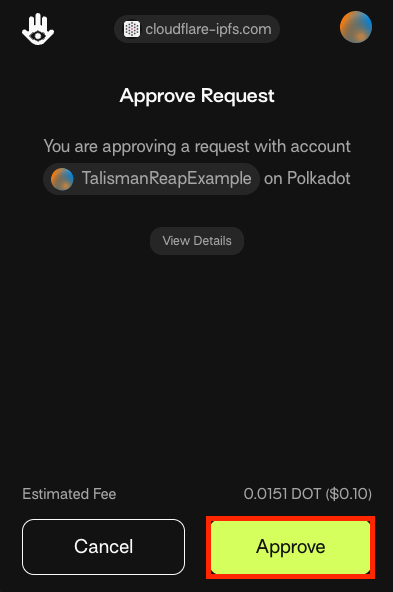
Step 10: You will then be prompted by the Talisman extension to Approve the transfer, or send:

Talisman Wallet: Click “Approve”
Click “Approve”

Step 11: You will then return to the main account page and see the funds are transferred and a 0.00 balance remaining:

Talisman Wallet: 0.00 Total Balance Remaining, meaning you have withdrawn the funds to another account and the account will be reaped at the next epoch.
0.00 Total Balance Remaining, meaning you have withdrawn the funds to another account and the account will be reaped at the next epoch.

Last updated